Programs Needed
- Paint Shop Pro
Tutorial
- Open Paint Shop Pro.
- Go to File > Open and open the image.
- Go to Image > Increase Color Depth > 16 million colors (24 bit). If you cannot select this option, the image is already 16 millions colors and you can still continue on with the tutorial.
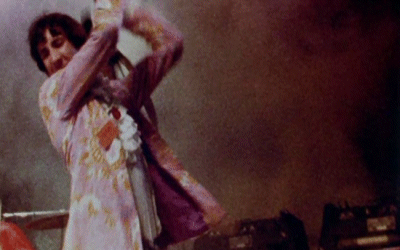
- Choose one of the Templates to use as your blog template.
- In Paint Shop Pro, go to Image > Resize, then UNCHECK the box at the bottom which says "lock aspect ratio". Type the height and width of the template in the boxes at the top. Make sure that it says Pixels to the right of your height and width.
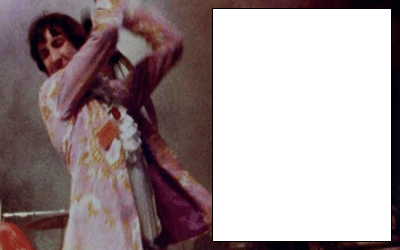
- Right click the template and choose Copy.
- In Paint Shop Pro, go to Edit > Paste > As New Layer.
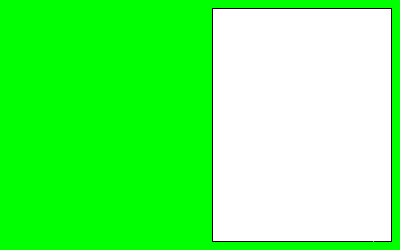
- Select the Magic Wand Tool
 (click the arrow beside the Selection Tool
  and choose Magic Wand from the list).
 - Click on the bright green area of the blog, then go to Edit > Clear to get rid of it.
- Go to Selections > Select None.
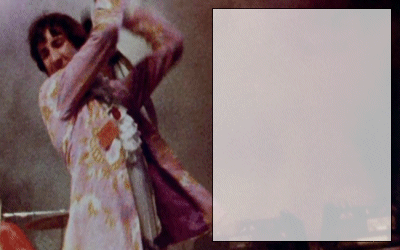
- Go to Layers > Properties and set the opacity to 70 and click OK. If you don't like the final result, go back and change the opacity to a higher or lower number until you get an effect you like.
- Select the Magic Wand Tool and click on the light area inside the black border (where your text goes). If there is more than one text area, hold down the Shift key while selecting each area.
- Select the Flood Fill Tool
 and choose a new colour for inside the box. Click inside the white box to fill it in.
 - Go to Layers > Merge > Merge All (Flatten).
- Go to Select > Deselect.
- Go to File > Save As and save your image.
- Upload your blog to the internet. Check out the Uploading Tutorial for help.
- Get the code that matches the template you used. Replace URLHERE with your blog's URL.
Blog Example
| Smashie smashie! Smashie smashie! Smashie smashie! Smashie smashie! Smashie smashie! Smashie smashie! Smashie smashie! Smashie smashie! Smashie smashie! Smashie smashie! Smashie smashie! Smashie smashie! Smashie smashie! Smashie smashie! Smashie smashie! Smashie smashie! Smashie smashie! Smashie smashie! Smashie smashie! Smashie smashie! |
<style type="text/css">
#container { color: black; text-align: left; width: 400px; height: 250px; background-image: url("https://spiders.coolcherrycream.com/images/tutorials/blog/psp-5.gif"); }
#content1 { left: 213px; top: 9px; overflow: auto; }
#box1, #content1 { width: 178px; height: 232px; position: absolute; }
#content1 table { padding: 4px; }
</style>
<div id="container">
<div id="box1"><div id="content1"><table><tr><td>
Smashie smashie!<br />Smashie smashie!<br />Smashie smashie!<br />Smashie smashie!<br />
Smashie smashie!<br />Smashie smashie!<br />Smashie smashie!<br />Smashie smashie!<br />
Smashie smashie!<br />Smashie smashie!<br />Smashie smashie!<br />Smashie smashie!<br />
Smashie smashie!<br />Smashie smashie!<br />Smashie smashie!<br />Smashie smashie!<br />
Smashie smashie!<br />Smashie smashie!<br />Smashie smashie!<br />Smashie smashie!<br />
</td></tr></table></div></div>
</div>