Programs Needed
- Paint Shop Pro
- Notepad (included on Windows computers)
Tutorial
- Open Paint Shop Pro.
- Open your image.

- Go to File > Export > Image Mapper.
- Select the Rectangular Mapping Tool
 if the link areas are rectangles. Otherwise, select the Freehand Mapping Tool
  .
. - Click and drag around the first link area.

- Repeat step 5 for each link area.
Note: If you cannot see the entire image in the preview pane, use the Zoom Out Tool .
. - Select the Arrow Tool
 .
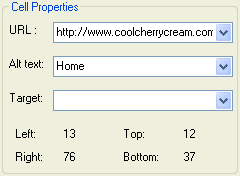
. - Select one of the link area surrounded by a red line. When you click on it, it will become green.

- In the "URL" box, put the address of the page you want this area to link to.
- In the "Alt Text" box, put the title of the page you are linking to.
- If you want the link to open in a new window, select "_blank" from the drop down list beside "Target".

- Repeat steps 8 - 11 for each link area.
- Click the "Save" button.
- Type in "imagemap" in the filename box. Click the "Save" button.

- Type in a name for the image map in the filename box. Click the "Save" button.

- Click the "Close" button.
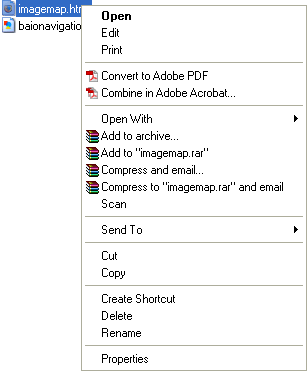
- Open the folder where you saved the files.

- Right click on "imagemap.html" (not the image file).

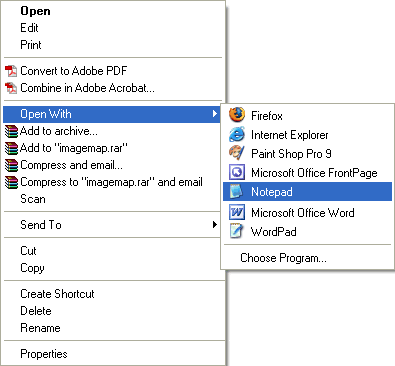
- Choose Open With > Notepad. If you do not see Notepad in the list, go to Choose Program and select Notepad (or another word processing program).

- This is the image map code. Remove everything between and including <html> and <body> at the beginning. Remove </body> and </html> at the end.
- Upload the image map to the internet. Do not upload imagemap.html, you only need to upload the actual image. Check out the Uploading Tutorial for help.
- Replace the part of the code that comes after "src" (in the code below, BAIONAVIGATION.gif) with the address of your image map from your image host.
<img alt="" name="imagemap0" src="BAIONAVIGATION.gif" height="132" width="209" border="0" usemap="#imagemap" />
Image Map Example
