Programs Needed
- Paint Shop Pro
Tutorial
- Find an image you would like to use for your layout.
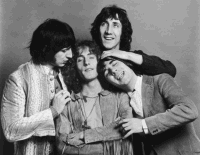
- Go to Image > Resize. Change the width to 500 pixels. The height should automatically be readjusted so that the image isn't stretched.
- Go to Selections > Select All.
- Go to Edit > Copy.
- Go to Edit > Paste > As New Layer.
- Hide and lock the bottom layer (in the Layer Palette, right click on the layer's name and choose Properties. Uncheck "Layer is visible" and check "Lock transparency" then click OK.).
- Remove the background from the top layer.
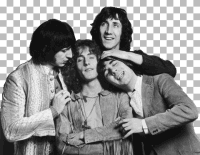
- Stay on the top layer and select the Magic Wand Tool.
- Hold down the Shift key and select the areas where you removed the background.
- Go to Selections > Invert.
- Switch to the bottom layer.
- Unhide and unlock the bottom layer.
- Go to Selections > Modify > Expand. Type 1 in the box.
- Go to Selections > Modify > Feather. Type 10 in the box.
- Go to Edit > Copy.
- Go to Edit > Paste > As New Image.
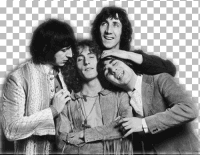
- Close the original image. You only need the image with the softened edges now.
- Go to Image > Canvas Size to find the height of your image in pixels (the width should be 500). If the width is not 500 pixels, go to Image > Resize and make the width 500 pixels. Remember the height and click OK.
- Save the file (not the image!) below that goes with the program you are using.
Paint Shop Pro 7 - WhiteBlack.msk | Paint Shop Pro 8, 9 - WhiteBlack.PspMsk
- Open the file.
- Go to Image > Resize.
- Change the height to the number you found in step 17. The width should be 500 pixels.
- Save and close the file.
- Go to Masks > Load From Disk.
- Find and select the WhiteBlack file that you saved in step 18. Click Open.
- Save the image.
- Save the file below.
Paint Shop Pro 7 - layout-template-1.psp | Paint Shop Pro 8, 9 - layout-template-1.pspimage
- Switch to the "background" layer.
- Fill in the background with a solid color.
- Switch to the "textareas" layer.
- Select the Magic Wand Tool.
- Hold down the Shift key and select the two white rectangles.
- Fill in the rectangles with a solid color.

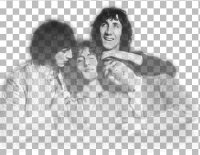
- Switch back to the faded image (step 25).
- Go to Selections > Select All.
- Go to Edit > Copy.
- Switch back to the template image (step 32).
- Go to Edit > Paste > As New Layer.
- Select the Mover Tool.
- Move the faded image so it is above the larger rectangle. It's okay if the rectangle overlaps it.
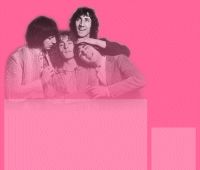
- Add any other effects you want to the image.
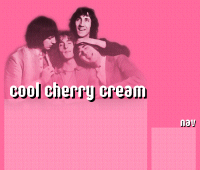
- Go to File > Save As and save the image as "header.jpg".
- Go to Image > Canvas Size.
- Set the width to 700 pixels, the height to 5 pixels, and the bottom to 0 pixels.
- Go to File > Save As and save the image as "background.gif".
- Upload both images (header.jpg and background.gif) to the internet.
- Use the following code for your layout.
<style type="text/css">
body { margin: 0px; background-image: url("images/background.gif"); background-repeat: repeat-y; background-color: #FFFFFF; }
#content { position: absolute; top: 350px; left: 15px; width: 500px; padding: 10px; }
#nav { position: absolute; top: 450px; left: 530px; width: 155px; padding: 10px; }
#header { background-image: url("images/header.jpg"); background-repeat: no-repeat; height: 600px; width: 700px; }
</style>

<div id="header"></div>
<div id="content">TEXT HERE</div>
<div id="nav">TEXT HERE</div> - Change "images/background.gif" and "images/header.jpg" to the URLs of your background and header images. Change the "FFFFFF" in "background-color: #FFFFFF" to the colour code for the background colour, so that you don't have white space at the side.
Layout Example
Layout Example Code
Go to the example page and the go to View > Source.