- Go to Bring On the Glitter, Sparkling Dots, or The Vault and find a sparkle image. Here is an example from Bring On The Glitter.

- Right click on the sparkle image and choose Properties.
- Right click on the address (not the word address) and choose Select All.
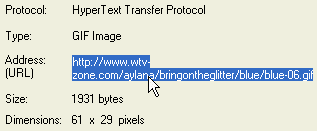
- Right click on the address and choose Copy.
- Click OK to close the Properties window.
- Paste the address of the sparkle image into the address bar and press Go. You should see a page with only the sparkle image on it.

- Leave the sparkle image open and go to Banner Generator.
- Type your sparkle name text in the "Banner text" box.
- Choose a font from the drop down "Font type" box. Font examples are located here.
- Do not change "Font size" or "Border size". Beside "Text color", select White.
- Beside "Background colour", select Transparent.
- Beside "User type", select WebTV (even if you aren't using WebTV).
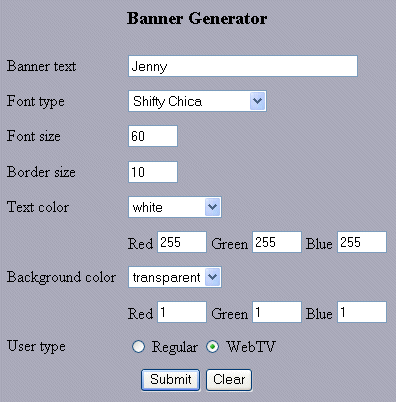
- Click the Submit button.
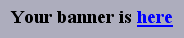
- Click on the link that says "here".
- You should see a blank page. Go to Edit > Select All to see your sparkle name (this does not work in Firefox). If you still don't see anything, start over and make sure you are following each step exactly.

- Copy the address in the address bar. It should look something like this:
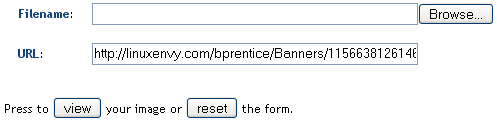
http://linuxenvy.com/bprentice/Banners/number.gif - Go to Magick Studio.
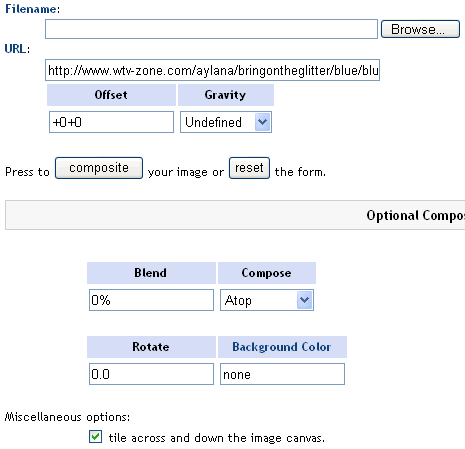
- Ignore the filename box and the Browse button. Paste the address from Banner Generator into the URL box.
- Click the view button.
- If you go to Edit > Select All, you should see your sparkle name below the first two paragraphs (again, this will not work in Firefox).
- Click Composite at the top navigation (it's at the end of the second row).

- Leave Magick Studio open and go back to the sparkle image from step 1 and copy the address in the address bar.
- Go back to Magick Studio and paste the address of the sparkle into the URL box.
- Go down and find the Compose options. Choose Atop.
- Go down and find the Miscellaneous Options. Click in the box beside Tile across and down the image canvas so that there is a check mark in it.
- Go up and click on the composite button.
- You should now see your sparkle name. It should not be sparkling yet.

- Go to the top navigation and click on Output (second button in the first row).

- Leave the settings alone and click on the output button.
- You should now see the finished sparkle name. Right click on the sparkle name and choose Save Picture As and save it as a gif file (if you save it as a bmp, png, jpg or anything else it will not sparkle).
Troubleshooting
If your sparkle name changes to a red x on your website, you are probably using the address from Magick Studio. You must upload it to your own image hosting account. Check out the Uploading Tutorial for help.
If your sparkle name is "blinking" or "flashing", try using a different glitter.
Sparkle Name Example