Sparkle Name Paint Shop Pro Tutorial
Programs Needed
- Paint Shop Pro
- Jasc Animation Shop
- Sparkle Tube (click here to download a free trial; click the sparkle after the globe and base, and extract it to one of the following:
C:\Program Files\Jasc Software Inc\Paint Shop Pro 7\Tubes
C:\Program Files\Jasc Software Inc\Paint Shop Pro 8\Picture Tubes
C:\Program Files\Jasc Software Inc\Paint Shop Pro 9\Picture Tubes\Artistic Tubes
C:\Program Files\Corel\Corel Paint Shop Pro X\Picture Tubes\Artistic
Tutorial
- Open Paint Shop Pro.
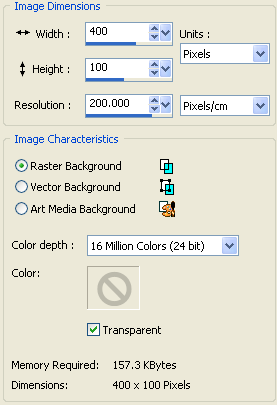
- Go to File > New. Set the width to 400 and the height to 100. Under Image Characteristics, choose "16 million colors" and check off the box beside Transparent.
- Choose a colour for your sparkle name. Change both your foreground and background colours to this colour.
- Select the Text Tool
 .
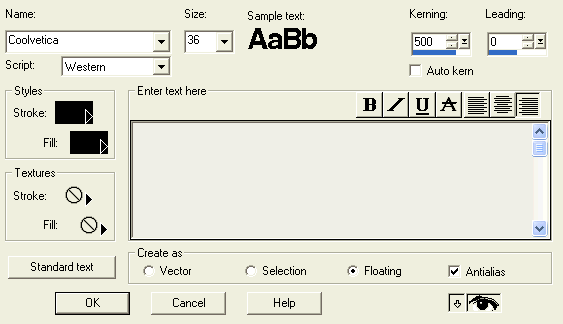
. - Set your text settings to match one of the following:
Paint Shop Pro 9
Paint Shop Pro 8
Paint Shop Pro 7
Change the font (Coolvetica) and size (36) to whatever you want. - Select the Mover Tool
 .
. - Move the name into the center of the image.
- Go to Edit > Copy.
- Go to Edit > Paste > As New Image three times.
- Close the original image.
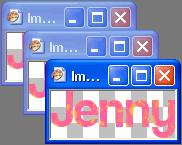
- Move the images so that you can see all of them.
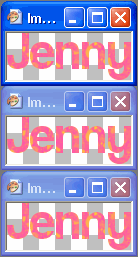
- Click on the first window (Image1) so that the title is highlighted.
- Go to Selections > Select All. There should be a dotted line around the entire image.
- Select the Magic Wand Tool
 .
. - Click on your text. The dotted line should now only go around the the text.
- Repeat steps 11 - 14 for Image2 and Image3.
- Go back to Image1. Go to Adjust > Add/Remove Noise > Add Noise. Change the "Noise %" to 45%, and click on random. Click OK.
- Go back to Image2. Go to Adjust > Add/Remove Noise > Add Noise. Change the "Noise %" to 35%, and click on random. Click OK.
- Go back to Image3. Go to Adjust > Add/Remove Noise > Add Noise. Change the "Noise %" to 25%, and click on random. Click OK.
- Go back to Image1. Go to Effects > 3D Effects> Inner Bevel. Change "Bevel" to the first style (1). Change "Width" to 2. Change "Smoothness" to 10. Change "Depth" to 2. Change "Ambience" and "Shininess" to 0. Change "Color" to white. Change "Angle" to 315. Change "Intensity" to 50. Change Elevation to "35". Click OK.

- Repeat step 16 for Image2 and Image3.
- Go back to Image1. Select the Picture Tube Tool
 . Change the picture tube to White Sparkle. Change the scale to 40. Place some sparkles on your image.
 - Go back to Image2. Select the Picture Tube Tool. Change the picture tube to White Sparkle. Change the scale to 30. Place some sparkles on your image.
- Go back to Image3. Select the Picture Tube Tool. Change the picture tube to White Sparkle. Change the scale to 20. Place some sparkles on your image.
- Save each of your images and make sure to keep them in order! I named mine "Jenny1.psp", "Jenny2.psp", and "Jenny3.psp". MAKE SURE to put ".psp" at the end of each file name (without quotations). If you save them as ".pspimage" files, they will not work in Animation Shop.
- Open Animation Shop.
- Go to File > Animation Wizard.
- On the first screen, choose "Same size as first image frame". Click Next.
- On the second screen, choose "Transparent". Click Next.
- On the third screen, choose "Upper left corner of the frame" and "With the canvas color". Do not click "Scale frames to fit". Click Next.
- On the fourth screen, choose "Yes, repeat the animation indefinitely". Type "20" in the box. Click Next.
- On the fifth screen, click on "Add Image". Find your first frame on your computer (Jenny1.psp) and click Open. Do the same for your next two frames. Click Next.
- On the sixth screen, click Finish.
- Go to View > Animation to see your sparkle name.
- Go to File > Save As.
- Select GIF from the drop-down list below the filename and save.
Sparkle Name Example
