Programs Needed
- Paint Shop Pro
Tutorial
- Open your image in Paint Shop Pro.

- Select the Magic Wand Tool
 .
. - Hold down the Shift key and click each part of the image that you want to be transparent.

- Select the Flood Fill Tool
 .
. - Change the Foreground color to lime green.
- Click in one of the selected areas that you want to be transparent to fill it in with green.
- Go to Selections > Select None.

- Go to Image > Palette > Set Palette Transparency (in older versions, go to Colors > Set Palette Transparency).
- An "Auto Actions" dialog box may come up on the screen. Click "OK".
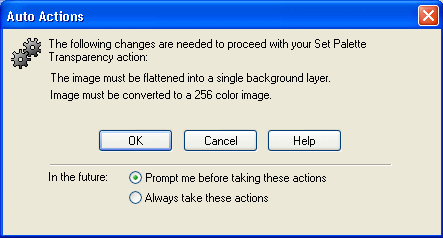
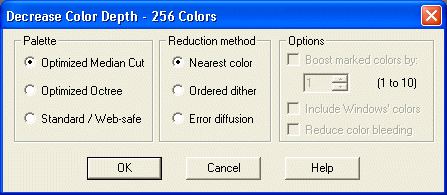
- If you are using PSP8 or PSP9, skip this step. If you are using PSP7, select "Optimized Median Cut" under "Palette", "Nearest color" under "Reduction method", and do not check anything off under "Options". Click the "OK" button.
- Choose "Set the transparency value to palette entry".
- Put your cursor over the lime green area on the image. The cursor should now be an eyedropper. Click the lime green area.
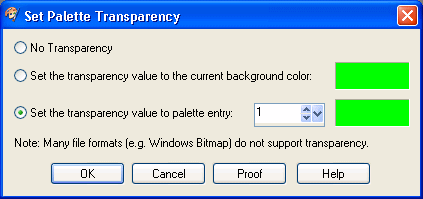
- On the dialog box, click "OK".
- Go to File > Save As.
- Select GIF from the drop-down list below the filename and save.
Transparent Image Example